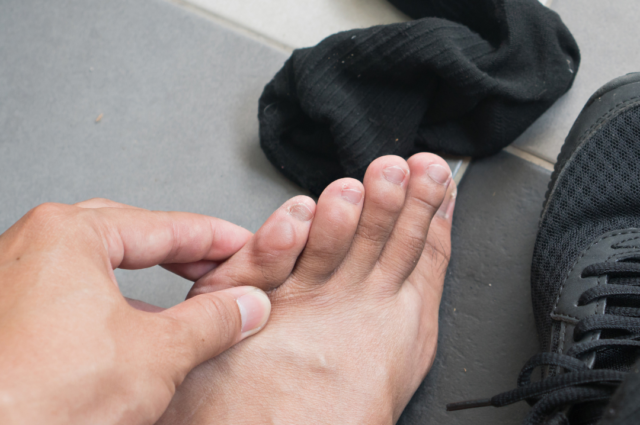
Blisters: they’re an enemy that most of us are far too familiar with – often accompanied by a fantastic new pair of shoes that we were initially very excited about. Instead, we’re left in pain and uncomfortable, searching for anything we can place over the blisters to cover them up and stop the stinging.
Blisters develop when the skin on your feet rubs against shoes or other surfaces, leading to a buildup of fluid under the skin. Blisters can be caused by a variety of factors, including friction, pressure, or heat that damages the outer layer of skin. Specifically, ill-fitting shoes, repetitive rubbing movements, excessive moisture, and sunburn (less common for the feet, but still possible) are all culprits.
Preventing Blisters on Your Feet
Given the severe level of pain that these tiny but powerful bubbles can inflict on us, it’s always a good idea to take steps, where possible, to prevent them. This includes:
Choosing The Right Footwear
One of the best ways to prevent blisters on your feet is to wear comfortable, well-fitting shoes. Shoes that are too tight or too loose can cause friction and pressure on your feet, leading to blisters. Look for shoes with a wide toe box that allows your toes to move freely, and avoid shoes with high heels or pointed toes.
Break in New Shoes
New shoes can be stiff and tight, which can cause blisters on your feet. To prevent this, break in new shoes gradually by wearing them for short periods of time at first and gradually increasing the length of time you wear them. You can also try stretching the shoes before wearing them to help loosen them up.
Wear Moisture-Wicking Socks
Moisture can contribute to the formation of blisters on your feet. To prevent this, wear moisture-wicking socks that help to keep your feet dry. Avoid cotton socks, as they tend to trap moisture and can contribute to blister formation.
Use Protective Padding
If you have a spot on your foot that is prone to blisters, and you’re about to go for a long walk or hike, re recommend using protective padding to prevent friction and pressure. Moleskin or gel pads are good options for protecting your feet from blisters – and your podiatry clinic may have their own preferred recommendations, or even some available for purchase.
Treating Blisters on Your Feet
Once blisters have developed, there’s only one goal: to get them healed up as quickly as possible and to prevent further irritation that will worsen your symptoms and pain. Here are our tips for treating blisters at home:
Leave Blisters Intact
If you do develop a blister on your foot, it is important to leave it intact. The blister provides a protective layer over the damaged skin and helps to prevent infection. If the blister breaks, clean the area with soap and water, apply an antibiotic ointment, and cover it with a sterile bandage.
Use Compresses
To help relieve pain and reduce swelling, you can apply a cold compress to the blistered area. A bag of ice wrapped in a towel or a cold, wet washcloth can provide relief. You can also use a warm compress to help reduce pain and speed up healing.
Use An Antibacterial Ointment
If your blister has popped, apply an antibacterial ointment to help prevent infection. Cover the blister with a sterile bandage to keep it clean and protected.
Rest Your Feet
If you have a blister on your foot, it is important to rest your feet and avoid putting pressure on the affected area. This will help to prevent further irritation and allow the blister to heal. Absolutely avoid doing the activities that caused your blister to form in the first place.
Should You Drain A Blister?
Generally, we do not recommend popping blisters. This is because this ‘opens’ up the blister and makes it more vulnerable to further damage, as well as infections. However, in some cases, like when the blister is large or in an area like the back of your heel where you know it’s going to be exposed to pressure that is likely to take the top of the blister off anyway, it may be necessary to lance the blister.
To do this, take a clean, disinfected needle and poke the blister from the side to drain the fluid. Once the fluid is removed, the pressure will subside. Then, soak your feet for 15 to 20 minutes in lukewarm water with Epsom salts. Using Betadine to help dry up the blister will speed up the healing process, keeping it safely covered and protected. You should notice your blister and the area around it getting better over the following days. If it’s not, contact your podiatrist immediately.
Need Advice On Blisters, Or Help Treating Or Preventing Them?
Then our team is here for you. We’re proud to be Auckland’s leading podiatry team, and understand the impact that painful blisters can have on your daily life and in helping you meet your health and fitness goals. Book your appointment by calling us on 09 523 2333 or book online here.
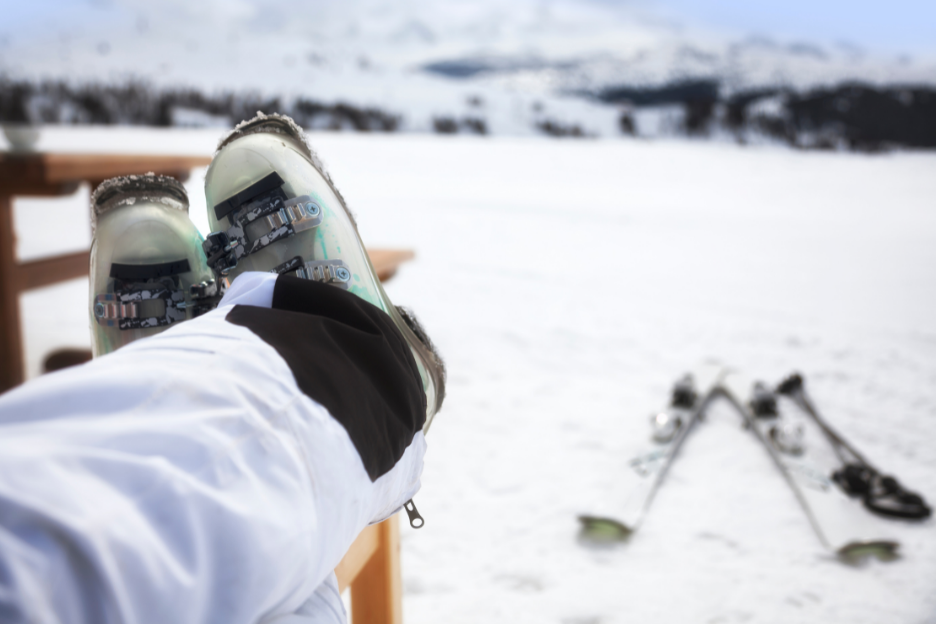
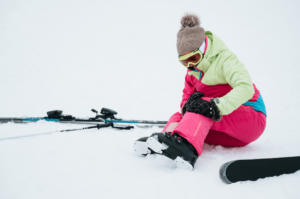
With a great deal of uncertainty about where we can and can’t travel this winter, there’s one place that many families are excited about heading to – their snow trip! While there’s a lot of information out there on how to best prepare your body for the ski season to help minimise your risk of injury – today we’re sharing one secret weapon our patients are loving that’s helping them to not only move better on the slopes but look and feel great too: pre-ski medical pedicures.
How do medical pedicures help prepare feet for the slopes?
There are a few common pains that our patients experience from the slopes that medical pedicures can help improve or prevent altogether – and the difference can make or break your ski experience. These include:
Trimming and thinning toenails
Bruised, bleeding toenails are something that many skiers and snowboarders have experienced – and often it’s from something as simple as leaving their toenails that little bit too long so they spend the day pushing against the ends or tops of the boots if they’re thick. It seems simple – but given the number of changes nails undergo with age, they can become extremely tough to cut, difficult to reach, and seemingly impossible to thin.
By safely and effectively trimming toenails, reducing their thickness and smoothing them during your medical pedicure, you can avoid this bleeding and bruising – and the pain that goes with it.
Removing corns
Corns are small, hard areas of callus that protrude into the foot and can feel like walking on small pebbles. They develop from areas of rubbing and friction in everyday life – often from shoes. They tend to appear on the heels, the ball of the foot, and around the toes.
When paired with tight ski or snowboarding boots, corns can become incredibly painful, and further rubbing against the corns can quickly make them worse. We’re able to remove corns entirely, leaving you without any pain or problems in your boots.
Reducing callus and cracked heels
Much like corns, callus develops in response to rubbing and pressure, but in larger areas on the surface of the skin. Callus can take up a lot of extra space in properly fitted boots, quickly making them uncomfortable. When callus builds up thickly and dries out, cracks can form, often in the heels. This can become very painful for snowboarders that spend half their time on their heels. If the cracks are deep, they can also crack the healthy skin beneath, causing bleeding.
Preventing itchy feet from Athlete’s foot
Ski boots create the perfect conditions for fungus to grow and thrive – they’re moist from the perspiration of your feet, enclosed and dark. These conditions can amp up your fungal infection and leave your feet feeling itchy and uncomfortable on the slopes. During your medical pedicure, we’ll provide you with information about your Athlete’s foot infection and team you with the right products to help manage it, so you can focus on your ski trip, not your itchy feet!
More than medical pedicures…
 While medical pedicures are a favourite with our patients, there are more ways that we work with our patients to help them on the slopes, including:
- Checking the size and fit of your ski boots
- Making custom slimline orthotics for your ski boots
- Conducting comprehensive biomechanical assessments to improve your comfort and performance and minimise your pain on the slopes
Read how we help with all of these here.
Ready to have the best season yet?
If you’re planning to hit the slopes, we recommend booking your medical pedicure within three or so weeks before you leave. To make your appointment, call us on 09 523 2333 or book online here.
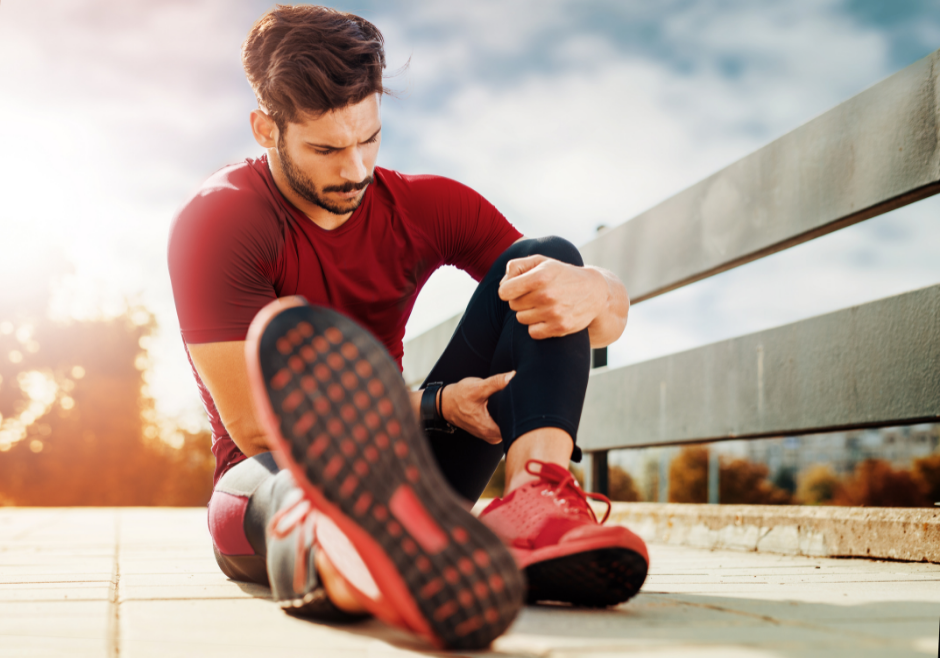
We ask a lot of our bodies when we run. The force through our joints and our legs easily exceeds three times our body weight – so it’s not all too surprising that a large portion of our patients are either regular runners, or developed their symptoms when wanting to get into running.
Today, we’re sharing the top four pains and problems we see and treat in runners, here in Auckland.
1. Shin Splints
Medically referred to as medial tibial stress syndrome, shin splints describe pain to the front and inside of the shins that often comes on during running and physical activity. The trick with shin splints in runners is that there are two other conditions that closely mirror the symptoms: a stress fracture to the shin bone (tibia), and compartment syndrome.
Effectively treating shin splints means looking at the way the muscles that attach to the front of the shins are being used when running. Often, biomechanical factors and poor foot posture means these muscles are overused and strained – flat feet, or pronation, is often a contributing factor. We must check the runner’s shoes and how they are affecting their performance and the way the shins and the muscles are being used. It’s also important to check how a runner is warming up, recovering after running, and stretching. Tight muscles, joint limitations and improper muscle conditioning are also common culprits in the development of shin splints.
To learn more about shin splints, click here.
2. Knee Pain
In any 12-month period, up to 70% of runners will sustain an injury from running – and 42% of these will be to the knee. There are two primary causes of knee pain we often see in runners – runner’s knee, medically referred to as patellofemoral pain syndrome, and iliotibial band syndrome.
Runner’s knee is an overuse injury caused by the irregular movement (tracking) and rubbing of the patella over the femur, while the knee is bending and straightening. Instead of gliding smoothly through a groove at the thigh bone, the poor alignment of the knee means the patella can mistrack and instead rub against the bone itself. This causes irritation at the joint and damage to the underlying cartilage and bone.
Iliotibial band syndrome is when the thick connective tissue called the iliotibial band (ITB) that runs down the outside of your thigh rubs against the outside of the knee joint, causing pain, swelling and damage to the tissue fibres. It’s common in runners as the rubbing tends to happen when you bend and straighten the knee repetitively – especially when you have a tight ITB.
Treating knee pain in runners effectively must focus on not only relieving the pain and helping repair the existing damage, but also addressing the cause to help prevent it from happening again in the future. Often this involves using a combination of custom foot orthotics, ensuring adequate footwear use, a targeted strengthening and stretching program, and changes to the running technique based on findings from a video gait analysis.
3. Calf Pain
Your calves are very important when you run – working up to 25% harder than your quads when running. When you need to stop or quickly change direction, they’re the ones that help you do so safely without injury. They help to stabilise your knee and absorb a large amount of force when you run. Hence, runners with calf pain are a common occurrence.
The most common cause we see for calf pain is overuse without the right preparation and conditioning, often combined with unaddressed tightness. Yep – we told you those super simple calf stretches could prevent injury! Treating calf pain involves addressing all the factors that are contributing to the overloading and strain, identified during the biomechanical assessment – which often includes a stretching program, strengthening, correcting any abnormal foot and leg biomechanics, and even looking at a little gait retraining to optimise performance and movement.
4. Heel Pain
When it comes to heel pain in runners, plantar fasciitis heel pain is a biggie. You’ll often hear of people referring to this pain as ‘heel spurs’ – though this is medically and physiologically incorrect. Plantar fasciitis heel pain is characterised by sharp, shooting and stabbing pain at the bottom and inside of the heel. It tends to be most painful when you stand after rest – especially after sleeping – before easing as you continue to walk.
Treatment must be specific and effective in order to prevent the tissue damage from progressing to a more severe injury – like a tear in the plantar fascia tissue – or even a rupture. We have a proven treatment that we find to be very successful, which includes temporary strapping, the use of good running shoes if you’re not wearing some already, custom-prescribed foot orthotics that address all structural and biomechanical foot and leg issues, and a stretching and strengthening program.
So, what’s stopping you from running?
If you’ve got a pain or problem during or after running, whether we’ve mentioned it above or it’s something completely different or unusual, we’d love to help. Treating foot and leg pain is what we do! And we have the best technology, skills and experience to allow us to do it excellently.
Book your appointment online by clicking here or call us on 09 523 2333